
Users add items to a list by clicking the plus button in the upper right hand corner of the section and filling out fields in the Add Item window. The fields included on the Add Item window can be configured by the App Admin.
- From the template, click on the Add icon (plus button) in the upper right of a List.
- When the Add Item dialog is displayed, click on the Customize Fields icon (wrench) in the upper right.
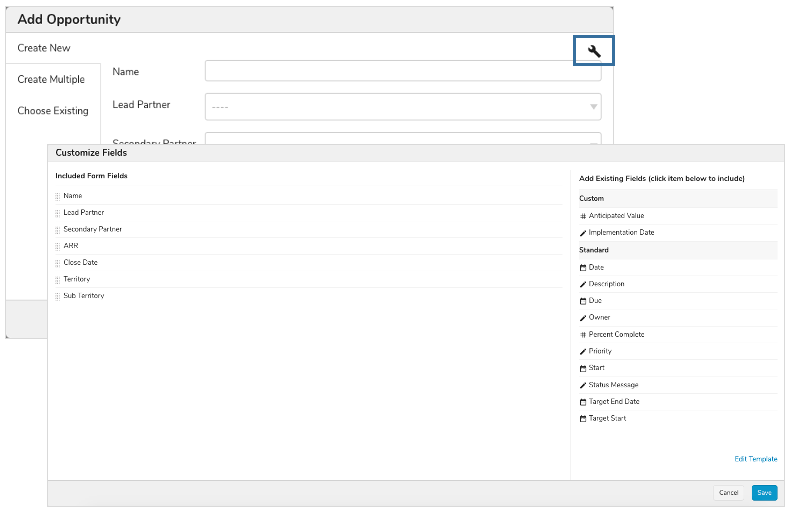
- The left panel displays the fields included on the Add dialog. The top to bottom order represents the order that they will be presented on the dialog.
- Click on fields on the Right panel to move them to the left panel.
- Use the row grabber to the far left to re-order the fields.
- Remove fields from the Add dialog by clicking on the “x” displayed when you hover over a field.
- Click the Save button and confirm that the changes apply to the existing template.