
Overview
Forms display fields that are used to collect and maintain critical and strategic program data. Attributes are first defined within the template Data Panel and can then be added as fields on Forms. Changes to the attribute definition can be done within the attribute settings dialog accessed via the Data Panel.
Edit Form sections can be added to a Layout to display and update values. Create Form sections can be used to create new child work items with relevant attribute values entered on creation. Sidebar Create Forms can be enabled for easy creation of new work items from anywhere in the solution. Tables can be configured to include both Edit and Create Forms to manage and create new data.
Adding Form Fields
When customizing a Form, click the Add Field button. This will open a drop-down menu to select the type of field you would like added.
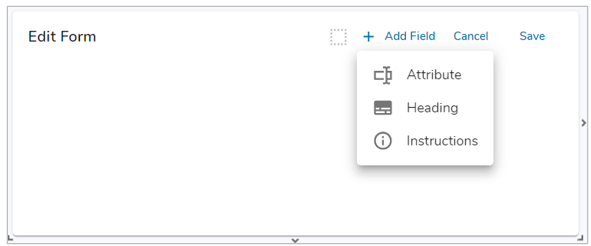
Available field types:
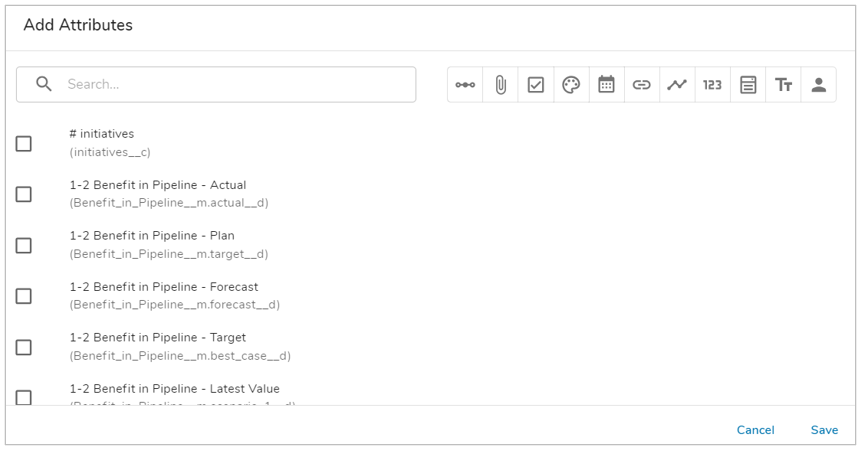
- Attribute: You can choose from existing attributes defined in the template. The icons (listed below in order from left to right) can be used to filter by category. You can also use the search bar to find an attribute. Click the checkbox of any attribute you would like to add and click Save at the bottom of the dialog.
- Association
- Attachment
- Checkbox
- Color
- Date
- Hyperlink
- Metric (Edit Forms Only)
- Number
- Pick List
- Text
- Role
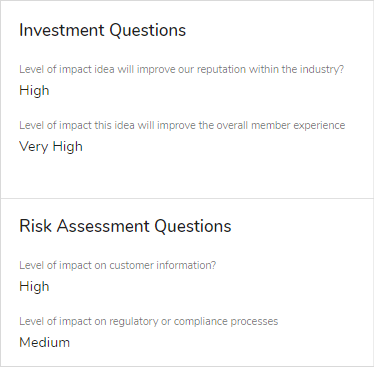
- Heading: A header can be added to help group similar fields together under a specific topic.
- Instructions: Like a help box, instructions can be added to a Form to help users understand what they are looking at and/or how the different fields will interact with one another. Instructions are identified by their background and corresponding “i” symbol.

Once all fields have been added to the Form, click the Save button and be sure to Publish your changes.
Dependent Associations within Forms
To ensure dependent associations work within a Form section, the association Filter Context must be configured in the association attribute’s details dialog. For example, if a Country association is dependent upon a Region association, the Country association’s Filter Context should be set to Region. This will ensure that when Region is selected, the Country association is filtered to only countries within that region.
Customizing Form Fields
After adding fields to your Form, click on the settings gear to the right of the field to launch the Customize Field dialog.
Setting Form Field Labels
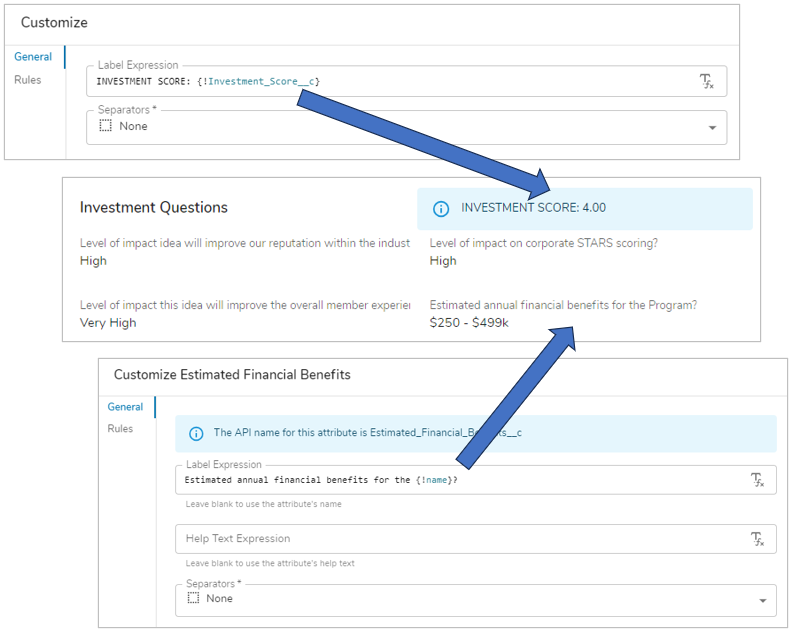
Fields can be renamed per Form section and injected expressions can be used to dynamically set their labels.
- Open the Customize Field dialog.
- In the Label Expression input, enter the new static field label or use the injected expression syntax (e.g., {!Attribute_API_name__c}) to define a dynamic label for the field.
- Save.
Customizing Field Help Text
By default, fields display attribute help text (defined and managed via Attribute Settings in the Data Panel) underneath the field input when in Edit mode. Attribute-level help messages can be overridden at the Form field level.

- Open the Customize Field dialog.
- In the Help Text Expression input, enter the new static help text or use the injected expression syntax (e.g., {!Attribute_API_name__c}) to define a dynamic help message for the field.
- Click Save.
- Ensure the Help Text is visible under the field by dragging the field height control to give enough vertical space below the field.
- Save.
Defining Separators
Separators are specific to each field. Using separators allows for clear groupings of fields within a Form and adds an organized aesthetic.
To configure separators on multiple fields at once, follow the steps below.
- While in Configure mode, select the Customize Layout option from the Form’s Section Controls.
- Select a field and then using ctrl/command + click on your keyboard and mouse to choose additional fields. Additional fields will be highlighted with the Enterprise Branding color.
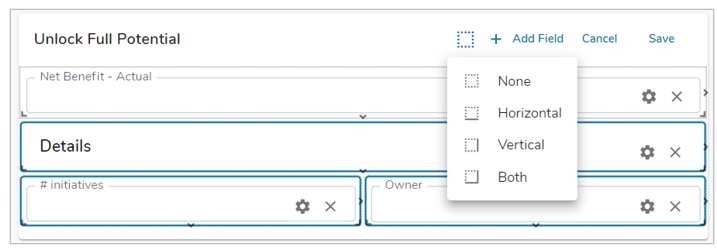
- Click on the Separators icon (square with dashed-line border) in the tool bar and choose from None, vertical, Horizontal, or Both.
- Save.
Note: The Separators icon location varies from the top of the dialog for Edit Forms to the bottom of the dialog for Create Forms.
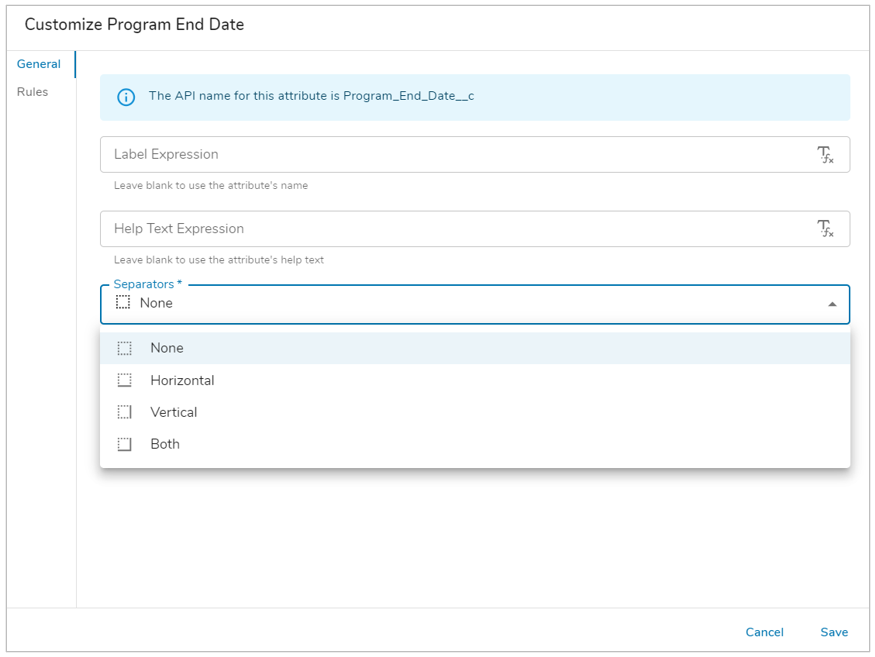
To configure separators on an individual field, follow the steps below.
- Open the Customize Field dialog.
- Select an option from the Separators drop-down menu. Choose from: None, Vertical, Horizontal or Both for the positioning of the separator around the field. Vertical separators appear on the right side of the field. Horizontal separators appear below the field.
- Save.
Required Fields
On the Rules tab of the Customize Field dialog, you are able to define whether the field will be required by selecting one of the options:
- Never Required
- Always Required
- Conditionally Required.
Note: When a field is designated as required, an asterisk(*) will appear next to the field label.
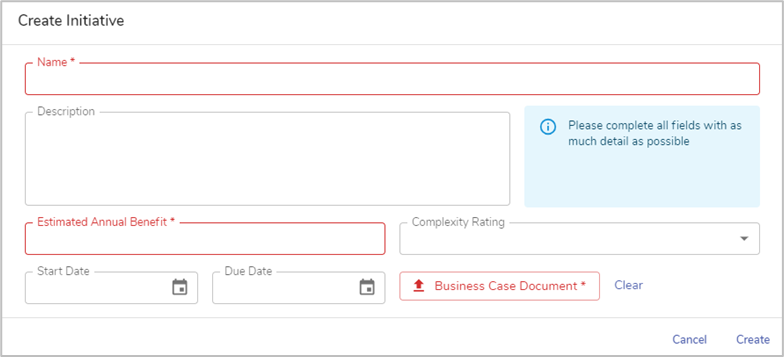
If a user doesn’t enter a value in the required field before clicking Save or Create, Shibumi will outline the empty required field in red to call attention to them and will not allow the action to save.
- Open the Customize Field dialog.
- Navigate to the Rules tab.
- In the Required Rule drop-down menu, select Never Required, Always Required, or Conditionally Required. When Conditionally Required is selected, an expression will need to be defined for the condition (see below for more details).
- Save.
Note: Calculated Attributes and Intrinsic Attributes cannot be required.
Conditionally Required Fields
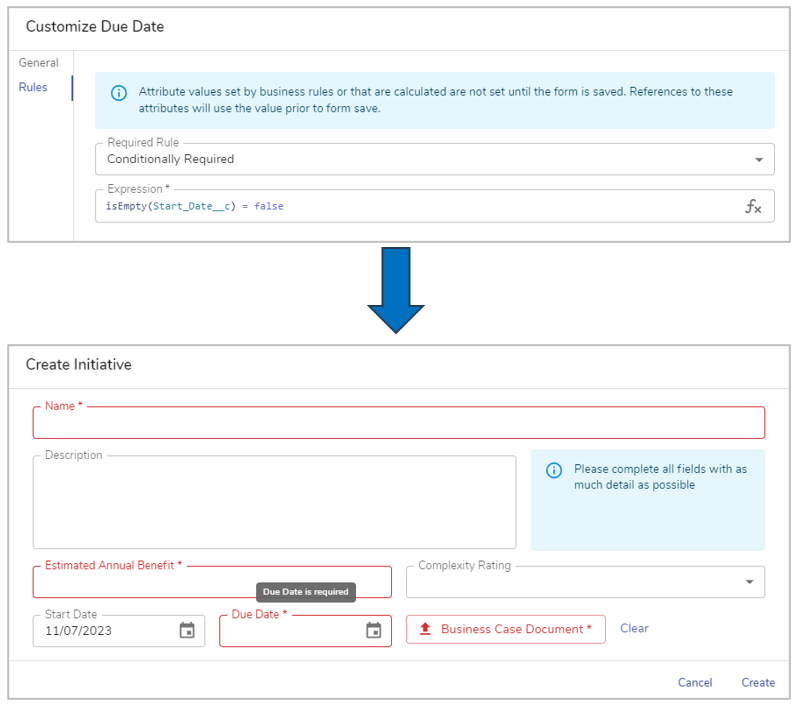
When defining Required Fields, there are times when a field will be conditionally required based on certain criteria. Select Conditionally Required from the drop-down menu. Enter an expression so that the field is conditionally required.
In the example below, the expression [isEmpty(Start_Date__c=false)] is evaluating whether the Start Date field has been filled out. If so, then the Due Date field will become Required. But if nothing is entered in for the Start Date field, then the Due Date field will not be Required.
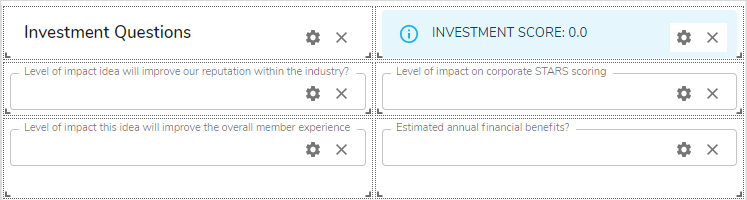
Conditionally Visible Fields
On the Rules tab of the Customize Field dialog for Form Fields, Headers and Information blocks, you are able to define whether the field will be visible by selecting either: Always Visible or Conditionally Visible.
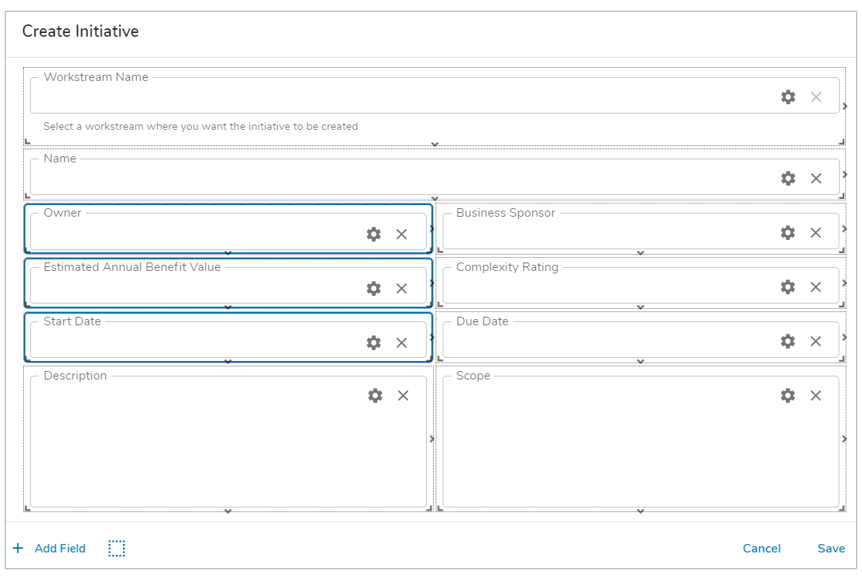
When selecting Conditionally Visible, enter an expression to define when the field will be visible in the Form. This expression will evaluate in real-time, allowing for dynamic Create/Edit Forms that will change their layout depending on which fields are filled in.

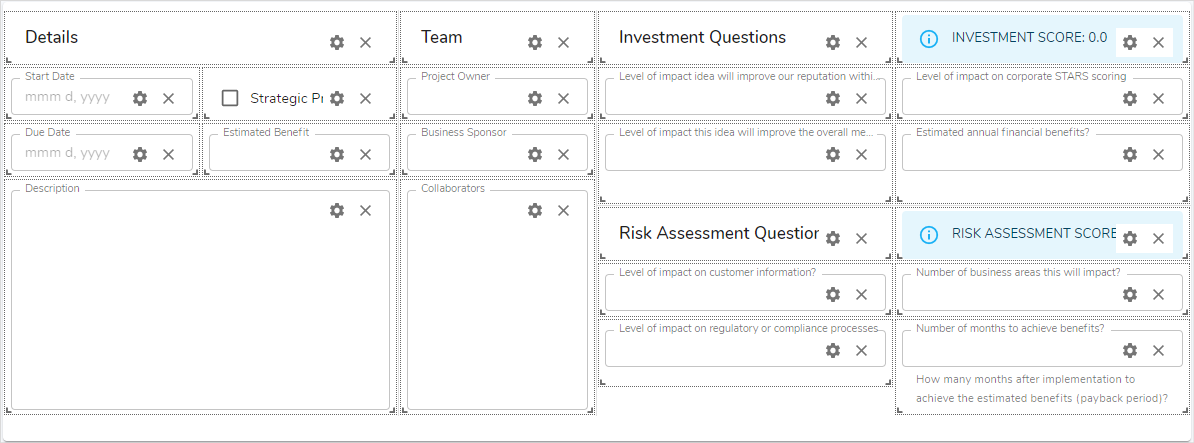
The example above demonstrates a Create Form in which the bottom row of fields are conditionally visible based on the value entered for the Complexity Rating drop-down.
Note: Fields that aren’t visible are implicitly not required. Additionally, Intrinsic Attributes cannot be conditionally visible.
Metric Fields within Forms
When configuring Metric Fields within Forms, there are a few additional steps required for configuration:
- Within the Metric field on the Form, click on the settings gear to open the customize field dialog.
- Enter an expression to change the Timeframe Date of the Metric (ex. addMonths(today(), -1) to show data from Last Month for a monthly metric).
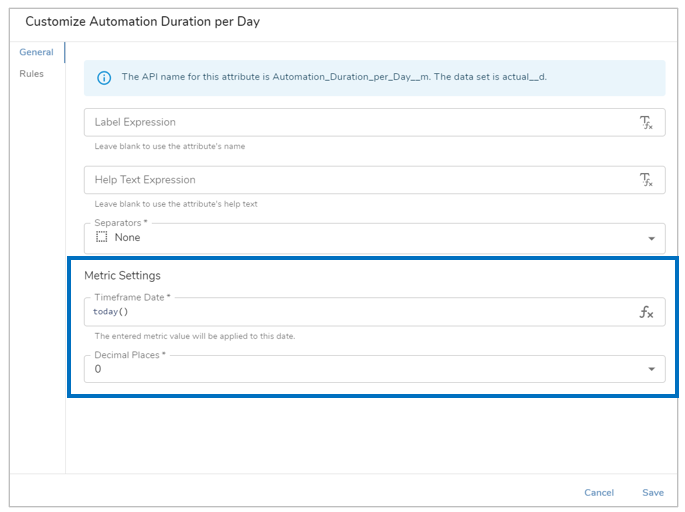
- Select the number of decimal places that should be displayed and Save.
Removing Form Fields
To remove a field from a Form, click the ‘X’ next to the settings gear while in Customize Layout mode. This removes the field from the Form but does not delete the attribute from the template.
Resizing Form Fields
Our flexible Form layout allows you full customization over the positioning of fields in you Forms. Within each form section, you can have up to twelve columns of data. Each field can be moved and scaled anywhere within the Form to ensure complete control of your template.
- While your Form is in Customize Layout mode, drag the resize controls in the bottom corners of a field to resize.
- Click and drag a field to move it around the layout.
- Be sure to size fields appropriately so there’s enough room for end users to enter content into the fields. Note: Multi-line fields (multi-line text, multi-user role, and multi-select pick lists) should be tall enough to accommodate several lines of text, if needed.
- Save the Form.