
Overview
In Shibumi, an App is the configured solution that tracks your strategic programs, projects, initiatives, etc. Apps consist of Shibumi templates, roles, and custom sections that can be customized to meet your organization’s unique needs. With Apps, we can quickly install and upgrade solutions, and manage changes with a three-tiered develop, test, production approach.
Creating an App
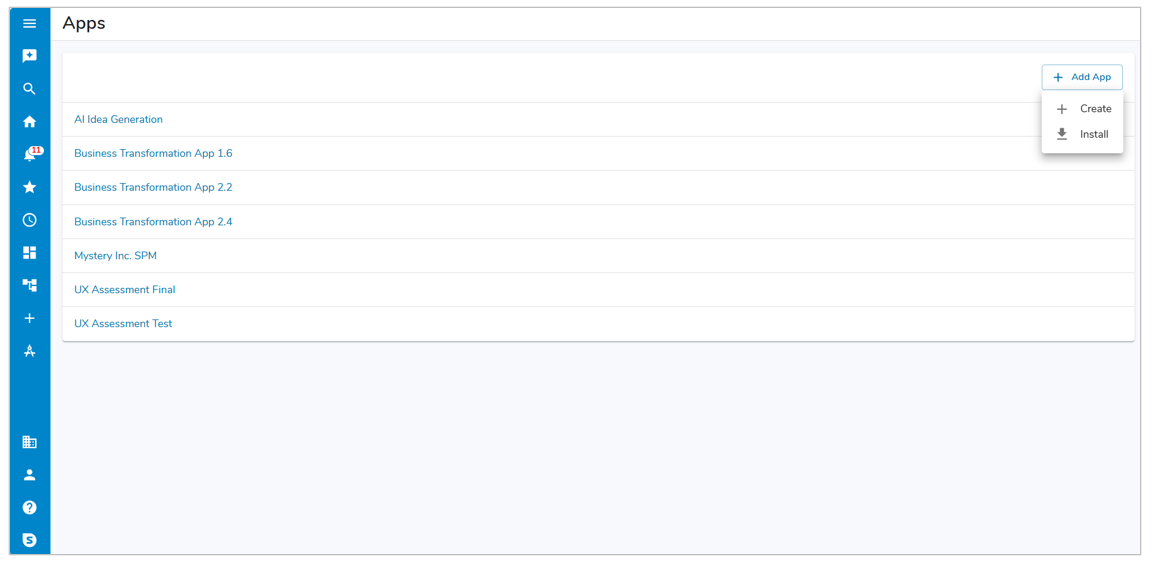
To create an App, you must be an Enterprise Admin or an existing App Admin. Click on the App icon in the Navigation Sidebar to access the App list. Then, click the Add App button and select either Create or Install. Provide a name for the new App and click Add.
- Create: Creates a new empty App with no templates nor configuration.
- Install: Installs an existing App from file, with a configured set of templates, roles, custom sections, etc.
App Detail Page
The App detail page lists the templates, roles, sections, navigation, data sets and create forms included in an app. It also provides the ability to upgrade or export an App, add or export templates, and view App history.
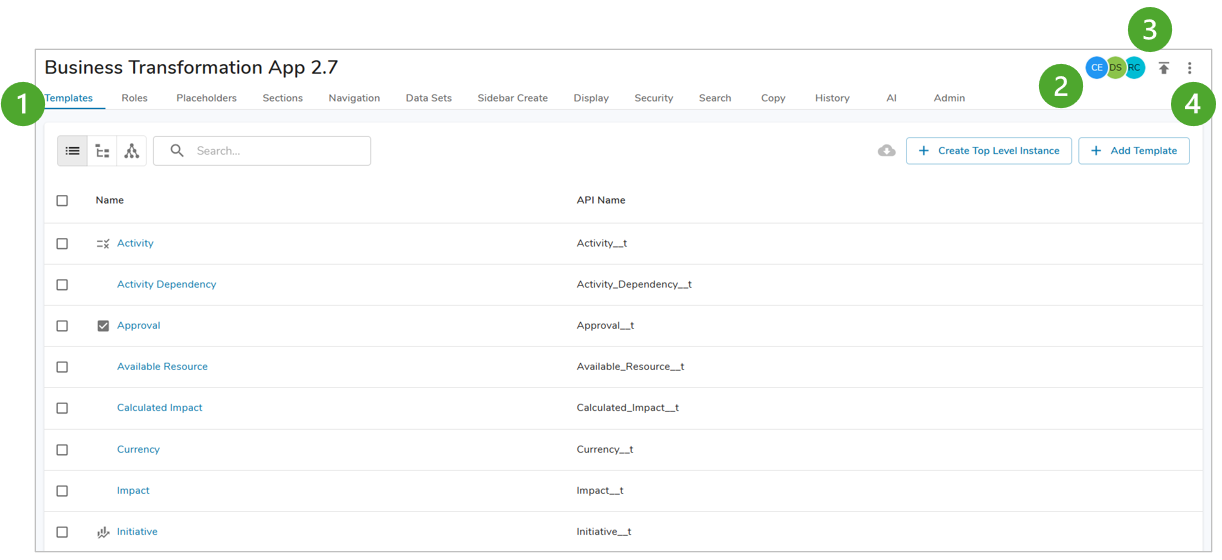
- Templates Tab: On the Template tab, you can add new templates, create new top level instances, and access or export existing templates. Templates are building blocks that define the hierarchy and structure of a solution and enable the collection and review of data. Learn all about customizing templates here.
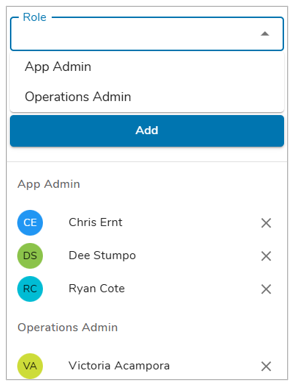
- App/Operations Admin Avatars: Click on the participant avatars to view the list of App/Operations Admins and to add new admins. Only existing App Admins can add new admins. Operations Admins can only add additional Operations Admins, not App Admins. Admins have complete access to the App to configure solutions.
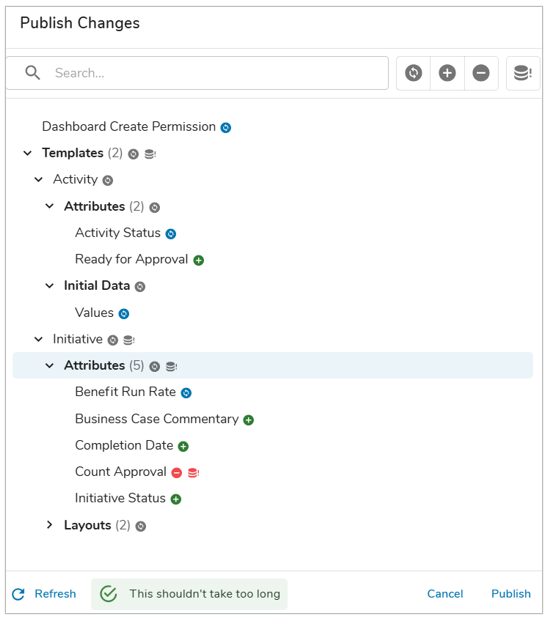
- Publish Changes: Select the icon to Publish all pending changes across the entire App. A dialog will display asking you to review the current proposed changes and the est. time it will take to finish publishing.
- Action Menu: Click on the more icon to access the action menu to upgrade, export, rename, validate, view differences or delete your app.

Graph View
The Template Graph from the App Details page visualizes both hierarchical relationships and associated templates, providing a complete view of the App structure.
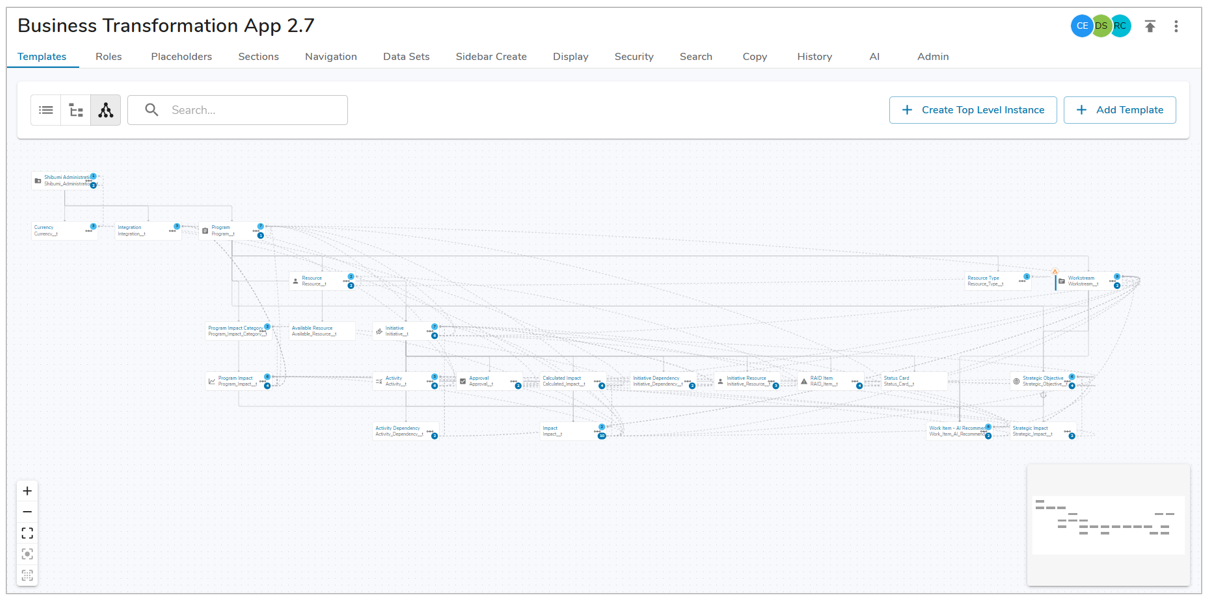
For each template ‘card’, the top value on the right represents the count of association backreferences and the bottom value is the associations for the template. Hover, over the association icon for a complete list. Any warnings or risks will be represented by their respective icons on the top left of each template card.
Notes:
- Selecting a template will highlight its immediate parent, child, and any associated templates. This can also be done via the search bar.
- While a template is selected, choose the ‘Focus Selected Templates’ option in the bottom left to view the templates which relate to the selected template via a parent, child, or associative relationship.
Exporting an App
From the action menu, click the Export option. A file containing the full App configuration will be downloaded. This file can be used to upgrade an existing App or to create a new App by installing it on the App list page.
Upgrading an App
Upgrading an App allows you to quickly apply changes to existing solutions. Upon upgrade, full App configuration is updated to match the configuration of the upgrade file. The upgrade functionality provides our partners with an easy way to centrally manage one version of their pre-defined Apps and apply updates to all their clients. Our customers with customized Apps can use this functionality to test solution changes in a development environment, then upgrade their App on production with the click of a button.
- From the action menu, click the Upgrade option. Only App Admins have permissions to upgrade an App.
- Select the file containing the new version of your App to which you’ll be upgrading.
- Click upgrade. The system will warn you of any changes that would result in data loss (e.g., attributes that now contain a calculation and may overwrite data, deleted templates, roles, or attributes, etc.), new templates, and deleted templates. If this list is not what you’d expect, cancel the upgrade. If you approve of the changes, click upgrade.
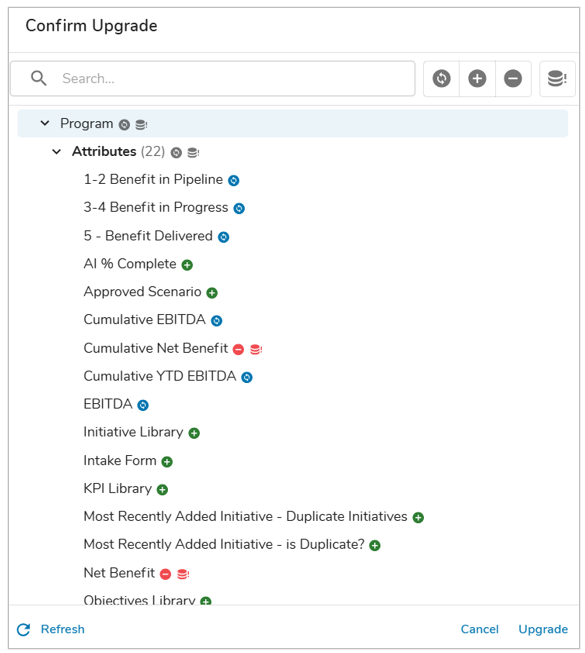
Note: There is a 50MB limit for App Upgrade files.
Renaming an App
From the action menu, click the Rename option. In the dialog, edit the name and then click Rename.
Validating an App
From the action menu, click the Validate App option. The Template Validation dialog will appear, allowing you to view errors and warnings about expressions defined in the Data Panel or in Tab Visibility expressions.
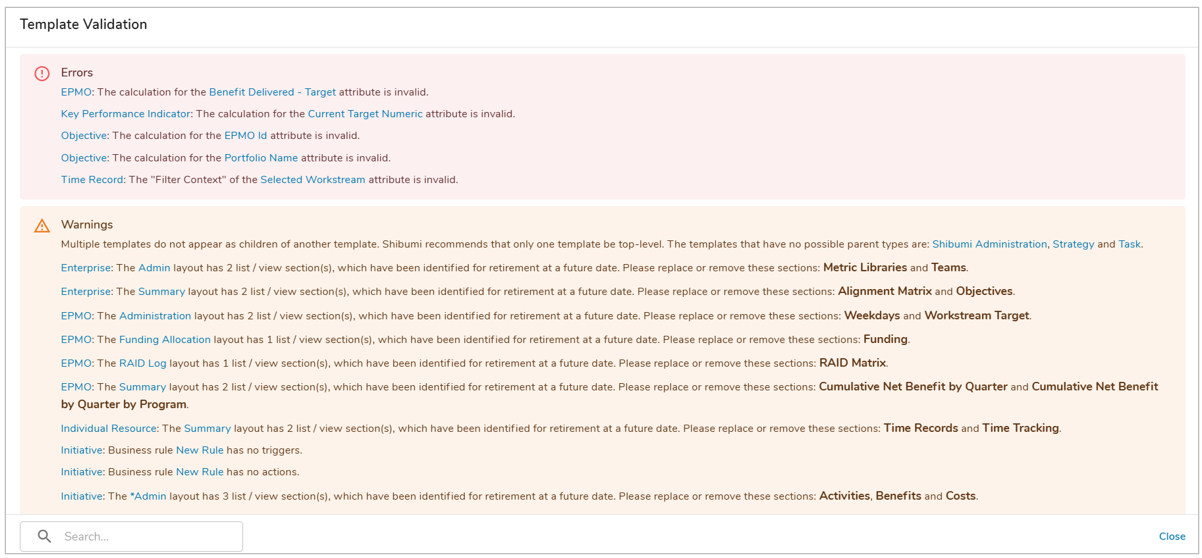
Note: Clicking on one of the hyperlinked options will take you directly to the configuration dialog where the error/warning is present.
View Differences
When multiple changes are being made to an App that are pending Publish, leverage the View Differences option to quickly assess all changes pending-publish across all Templates.
From the action menu, select the View Differences option. The App Differences dialog will display any pending-publish updates to existing templates, new templates, and removed templates. Additionally, any changes that could result in data loss will be highlighted.
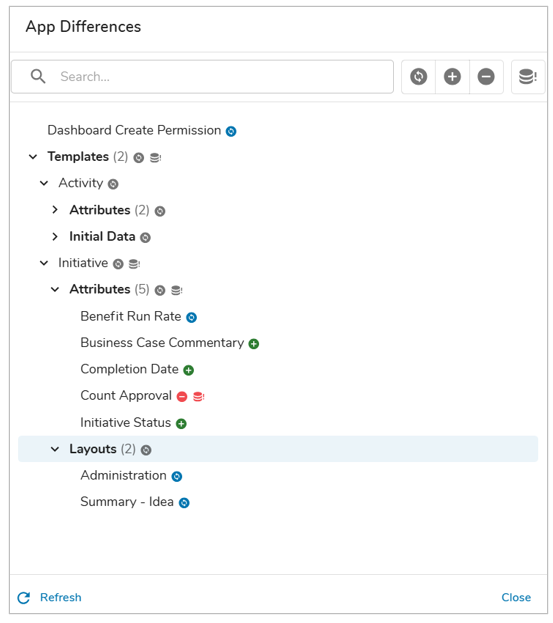
To review an individual template’s changes, select the Inspect Changes icon.

Deleting an App
An App can only be deleted if there are no instances of any of the App templates.
From the action menu, click the Delete option. In the dialog, click Delete. The delete option will be grayed out if the App cannot be deleted and a list of templates with instances will be shown in the dialog.