
Overview
The Table section is an extremely performant, display of work items (i.e., instances of a template) or associations. Tables allow for creation of new work items, singular and bulk editing of data, and easy configuration to respond to page filters.
Creating from a Table
When Create is enabled for a Table, you will see a ‘+’ in the top right of the section. This allows for the creation of new work items for any Row Types defined for the section.
Single Item Creation
Follow the steps below to successfully create a new work item directly from a Table:
- Select the type to create via the drop-down menu. Once a type is selected, a Create dialog will appear. If there is only one type defined for the Table, then you will be brought directly to the Create dialog.
- Select the parent item under which the new item will be created. If the current item is a possible parent, the drop-down menu will default to it.
- Fill in the necessary fields on the Create dialog and click ‘Create’.
- A success banner will appear with the option to view the new work item.
Note: If an association is selected as a row type, the association will be automatically created.
Bulk Item Creation
Follow the steps below to successfully create multiple new work items directly from a Table:
- From the Create dialog, toggle on ‘Bulk Create’ at the bottom left of the dialog.
- The dialog will transition to a spreadsheet-based format with each of the defined fields on the Create Form visible as columns.
- Add new work items to the dialog, select the ‘Create’ button.
- A pop-up will display indicating the new items were created, select the ‘Create More’ to continue or ‘Done’ to close the create dialog.
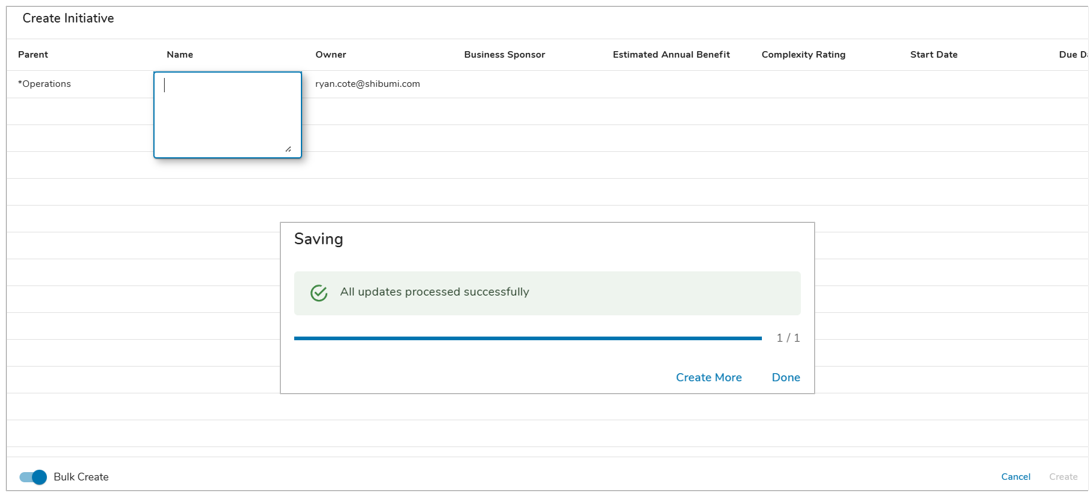
Note: Rows that are shaded green indicate they are work items created within the Bulk Create dialog.
Editing Values in a Table
Table editing can be broken down into two categories: singular and bulk. Each of which must be enabled by an App Admin in order to be used.
Single Item Editing
When single-item editing is enabled for a Table, you will see a small ‘pencil’ icon on the far-left column for each work item. Selecting this will open the Edit dialog for that work item.
Follow the steps below to edit a row in a Table section:
- Select the Pencil icon in the left column of the work item’s row.
- An Edit Form will open with fields defined by the Admin. Edit the desired values.
- Save.
Single Item Deletion from a Table
On a Table section, individual work items can be deleted directly from the section if the user has permissions:
- Identify the work item you want to delete.
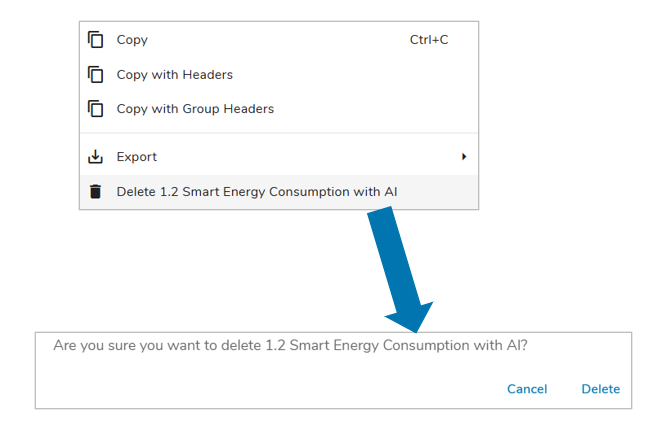
- Right-click on the work item’s row in the Table.
- From the menu, choose the “Delete [Work Item Name]” option.
- A dialog will appear asking for confirmation to delete the work item. Select “Delete”.
Bulk Editing Tables
When Bulk Editing is enabled for a Table, there will be an additional icon in the Table header.
![]()
Selecting this option will open the Bulk Edit dialog, allowing you to edit multiple work items and their values at a time.

A few key notes about Bulk Editing of Table sections:
- Edit values by clicking into the cells. Any changed values will have a ‘tag’ in the corner.
- Copy/Paste can be done directly from Excel or from other cells.
- Date values copied from Excel need to be in ISO format (yyyy-mm-dd)
- Autofill is also supported, which provides the ability to drag the value of one cell (by selecting the grabber in the bottom left of a cell) and paste it into other cells.
- Upon selecting ‘Save’ a dialog will appear with the number of changes made and if they were successfully applied. Errors will be highlighted and hovering over the cell will provide information regarding the error.
- Calculated and attachment attributes cannot be Bulk Edited.
Bulk Deleting from a Table
Bulk Delete is available for any Table, Metric Table, or Tree View section which has Bulk Edit enabled. Bulk Delete is only accessible through the Bulk Edit dialog, and will only allow users with the necessary permissions to delete work items.
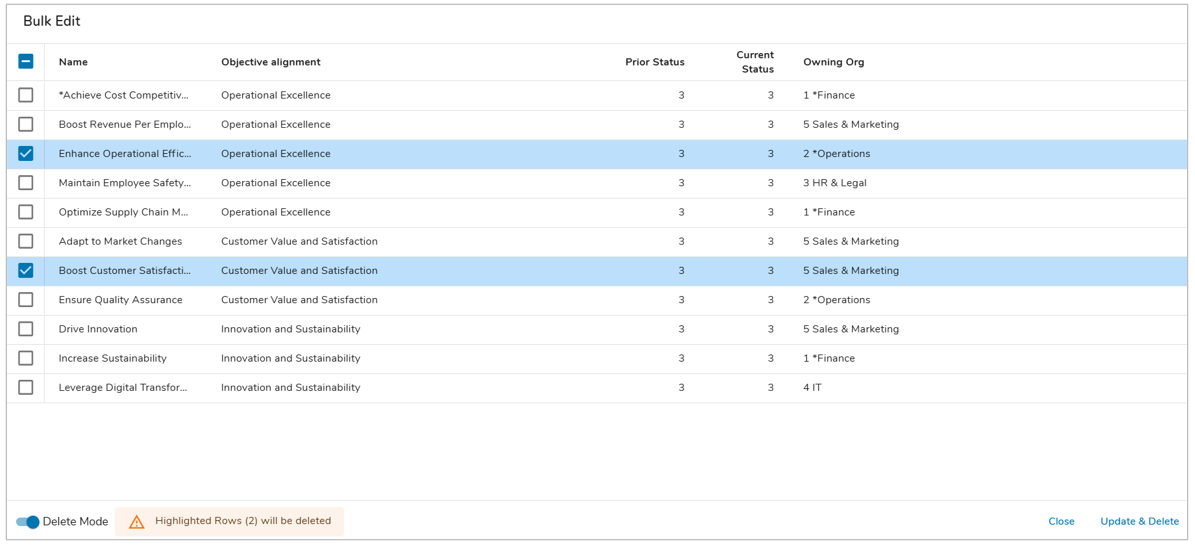
- With Bulk Edit open, toggle on ‘Delete Mode’ via the toggle in the bottom left of the dialog.
- Select one or more work items to be deleted via the checkbox to the left of each work item.
- Click the ‘Update & Delete’ button, you will be prompted for confirmation of deletion. Once confirming, a success banner will appear notifying you the work items have been deleted.
Filtering a Table
Tables can be filtered by end users. These filters are user-specific and clear out on page refresh.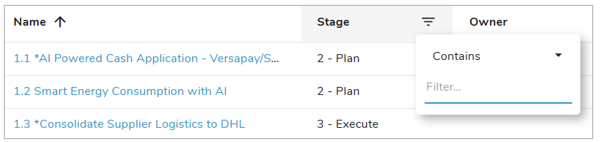
- Hover over the header of the column you’d like to filter.
- Click on the menu icon that appears.
- Filter options will differ by column type. Enter filter values. The Table will filter immediately.
Adjusting Table Columns
Users can adjust column widths directly within a Table section by dragging column borders to better fit their screen or highlight relevant information. These adjustments are session-based and reset to the template-defined configuration when the page is refreshed.
Sorting Table Columns
Each column within a Table section can be sorted by clicking on the name of the column. The sort icon will appear displaying the direction and order of the sort. While you can change the sorting of columns freely, the default sorting (if configured by an admin) will return upon page refresh.
To define multiple column sorting, hold down the Shift key on your keyboard and select additional columns by which to sort. A number will appear next to each sort selection to distinguish the order in which the columns are sorted.
Exporting Table Content
The content in a Table section can be exported to a CSV or Excel (.xlsx or .xml) file. The export will respect any filters that the user has applied to the Table section.

To export, you can either:
- Click on the settings gear in the upper right corner of the section and click on the desired export format.
- Right-click on a cell in the Table. Select Export and choose the desired export format.
The file will be exported and immediately downloaded.
Copying Table Cell Content
The content in a single cell of a Table section can be copied to your device’s clipboard. You can copy the cell value independently or accompanied by the cell’s column header.
To copy:
- Right-click on a cell in the Table.
- Select the Copy, Copy with Headers or Copy with Group Headers (if rows are grouped) option.
The value in the cell will be copied to your clipboard.
Metric Column Drill Down
Metric Columns within Table sections have the inherent ability to drill down into the data behind each cell. Depending on the type of Metric column (Aggregation, expression, or manually entered) displayed in the table, different dialogs will be displayed for each type.
- Aggregation – Metric values contributing to the selected Table cell are broken-down by the period of measure for the Metric.
- Expression – The metric value selected on the table cell will be displayed alongside the expression used to obtain the value.
- Manually Entered – The metric value selected on the table cell will be displayed next to the respective work item name.