
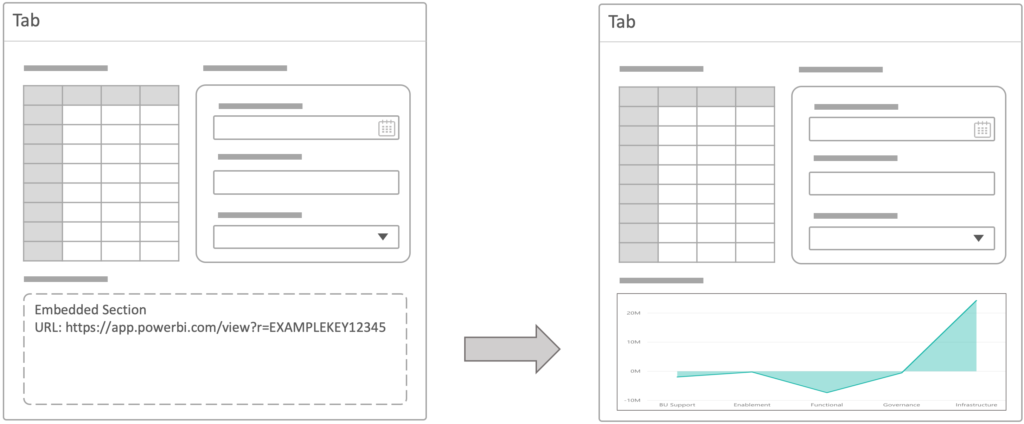
Embedded sections allow you to define a section on a Shibumi tab, dashboard, or presentation slide that displays content from another website. This capability provides a way to extend Shibumi’s native visualization capabilities.
Adding an Embedded Section
The first step in setting up an embedded section is to identify the URL that represents a website you’d like to display inside of Shibumi.
The URL can point to a site that does not rely on Shibumi content, for example, a utility website such as a Currency Conversion site.
A more common use case, however, is to pass information from the Shibumi work item to the site using URL parameters. This would allow you, for example, to embed a site from a business intelligence solution reporting on Shibumi data.
Note: Some solutions do not allow their content to be displayed by URL reference. If nothing loads in the Shibumi section, and you’ve checked the accuracy of the URL, it’s likely that the site defaults to not allow itself to be embedded.
Once the site to be embedded is identified, select the Add Section button on a Shibumi tab, dashboard, or presentation.
- On the Add Section dialog, select the Embed category and click the blue Add button.
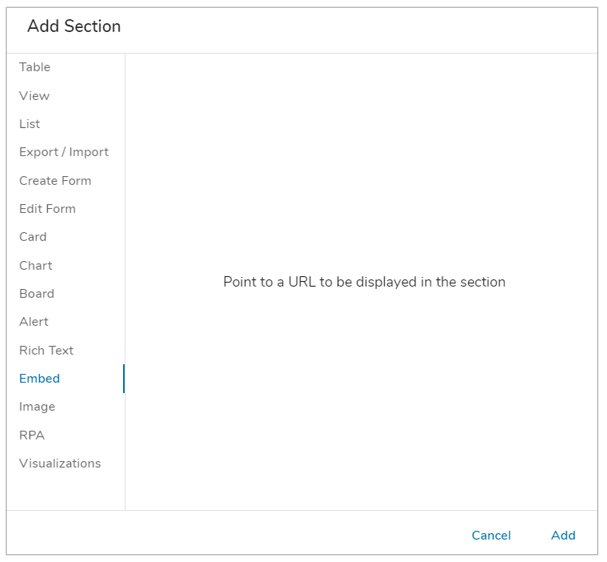
- While in Configure mode, select the Settings gear from the Section Controls to open the Settings. Here you can enter the URL for the section. The URL represents the website that will be embedded in the section.

- Add a section title by clicking the Rename icon from the Section Controls after the embedded section has been added to the layout.
Note: The URL can be a hard-coded address or can be defined with the Shibumi expression language using the injected expression {!} syntax. E.g.,:
- {!https://app.powerbi.com/view?r=”&Initiative_ID__c}
- {!if(Business_Unit__c=”Finance”,URL1__c,URL2__c)}